


 English
 한국어
한국어
 русский

Address:
No.233-3 Yangchenghu Road, Xixiashu Industrial Park, Xinbei District, Changzhou City, Jiangsu Province


Content
Ask any machinist who has heard that unmistakable squeal when a cutter is pushed straight into a pocket, and you will get a quick answer about tool geometry. A center cutting end mill is the tool that lets you make that vertical move on purpose. It is not an exotic specialty item; it is a daily workhorse in pockets, slots, mold cavities, and electrode work.
But "center cutting" is often treated as a yes-or-no box on a spec sheet. In practice, the center of the tool is where heat, chip packing, and chatter meet. Understanding what happens there helps you choose a cutter that plunges cleanly, ramps predictably, and finishes a floor without leaving a small uncut island in the middle.
On a center cutting end mill, the end teeth extend to or very near the tool axis. That means the face of the cutter has cutting edges across the center, not a solid web. When the tool moves down in Z, those center edges engage the material and form the bottom of a pocket or slot.
A non-center cutting end mill is different. Its end teeth stop short of the center, leaving a small uncut core. That design can be strong and efficient for side milling, but it is not intended to plunge straight into solid material. If you try, the center of the tool rubs, pushes, or breaks rather than cuts.
One practical caution: center cutting does not turn an end mill into a drill. The flutes are shorter, the chip room is different, and deep blind holes still belong to a drill or a specialized plunge tool.
Center cutting matters most when the tool has to start a cut in the middle of the part. That includes pocket entry, slotting, helical interpolation, ramping into a cavity, and 3D contouring where the cutter must move down and sideways in one smooth path.
It is also useful in mold and die work. A center cutting ball or flat tool can enter a pocket, ramp to depth, and then follow the surface without a separate drill operation. The gain is not just speed; it is fewer setups, less tool changing, and a more predictable process.
| Feature | Center cutting | Non-center cutting |
|---|---|---|
| End teeth | Cut to or near the center | Leave an uncut core |
| Axial plunge | Yes, with controlled feed | Not intended |
| Ramping and helical work | Usually well suited | Limited and design dependent |
| Typical use | Pockets, slots, entries, contours | Side milling and finishing |
The table is a starting point, not a rulebook. A center cutting tool with a long flute length and tight chip room can still struggle on a deep plunge. Match the entry method to the whole tool, not just the end geometry.
Flute count changes how a center cutting end mill behaves at the center. A 2-flute tool has more chip room, which is why it is common in aluminum, copper, and other gummy materials. A 4-flute tool balances chip evacuation with core strength and is a sensible default for steel, stainless, and general milling. A 6-flute tool adds stiffness and finishing capability, but the reduced flute space makes plunging less forgiving.
For general-purpose work, a 4-flute flat center cutting end mill is often the first tool we reach for when the operation includes a short plunge, a slot, or a pocket entry. It is stable, easy to feed, and available in a wide range of diameters.
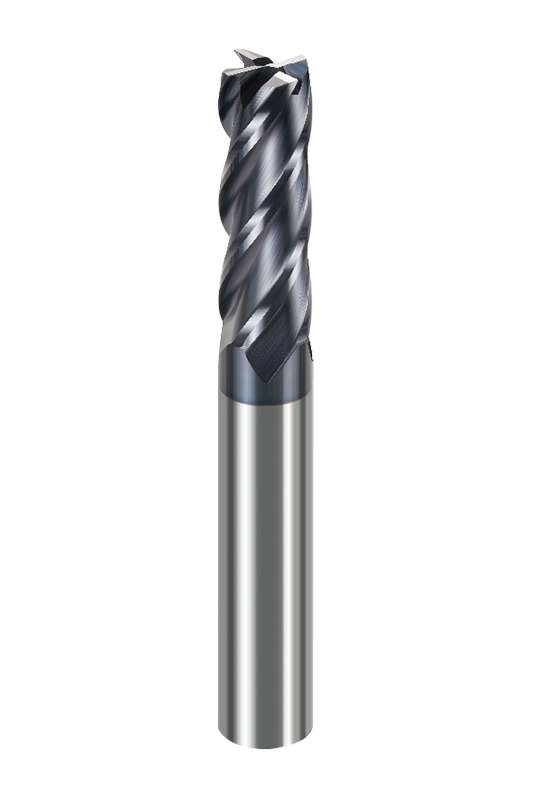 4 Flute Flat End Mills for General-Purpose MillingUniversal 4-flute flat center cutting end mill in diameters from 1 to 20 mm, suited to short plunges, slots, pockets, and steel or aluminum work.View Product →
Unequal flute spacing is worth considering for stainless and titanium. The irregular pitch breaks up vibration and can make a center cutting tool feel calmer during ramp-in and corner work. It does not replace good workholding, but it gives the cutter a better chance.
Aluminum and copper reward sharp edges and generous chip room. A 2-flute or 3-flute center cutting end mill with polished flutes can plunge and ramp without packing the flutes. For aluminum, the goal is to let the chip leave the cut quickly, because a recut chip is often what damages the edge.
Stainless and titanium need more attention to heat and vibration. Unequal pitch, a strong core, and a controlled ramp are more important than a sharp-looking edge alone. Climb milling with a stable setup and good coolant flow usually gives a better result than a fast plunge into a hard-to-cut material.
When the job moves to 3D surfaces, radiused corners, or a die-mold cavity, a 2-flute ball nose center cutting end mill can plunge and then follow the surface. The ball shape lets the tool work into corners, while the center cutting end teeth allow a direct entry where the CAM path calls for it.
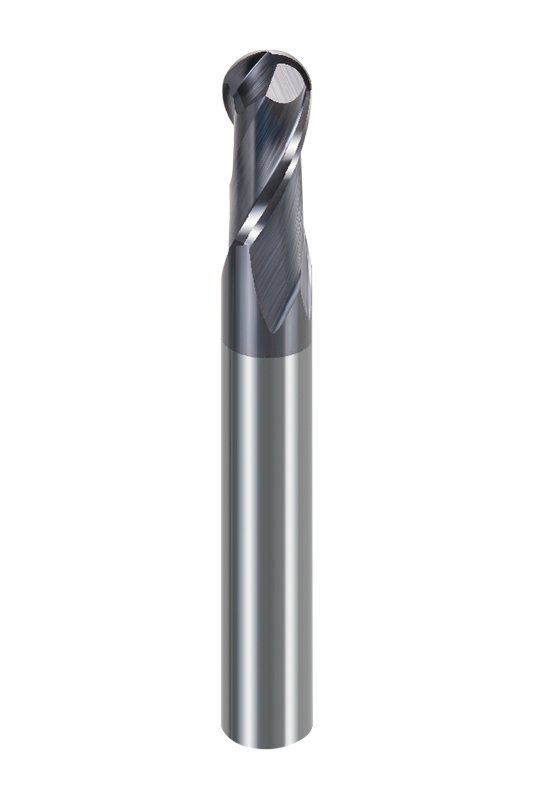 2 Flute Ball Nose End Mills for 3D ContoursUniversal 2-flute ball nose end mill with R0.5–R10 radii, suited to 3D surfaces, radiused corners, and die-mold cavity work.View Product →
Hardened tool steel and high-hardness molds call for a different balance. Here, edge strength and precision matter more than open flute space. A high-precision 4-flute flat center cutting end mill can hold a floor and a wall in the same operation, provided the machine and holder are rigid enough for the job.
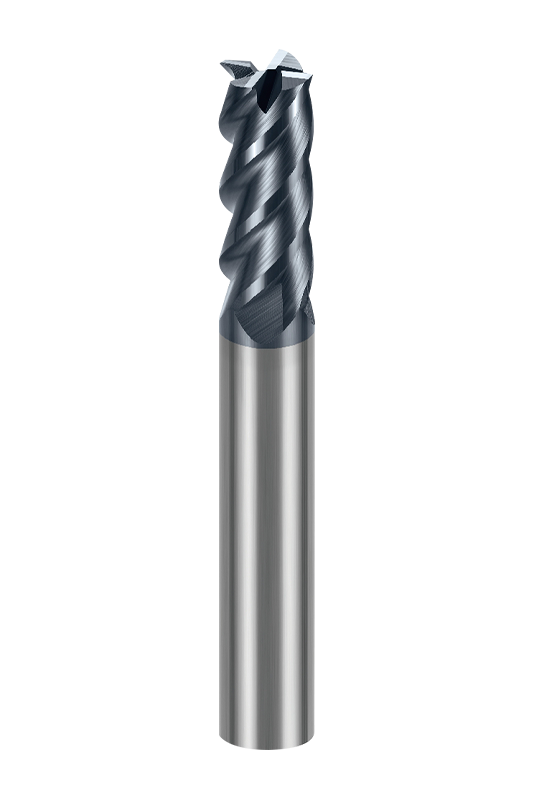 High-Precision 4 Flute Flat End Mills for Hardened SteelShort-blade 4-flute flat end mill for HRC45–70 hardened steel and precision mold parts, offering wear resistance and surface quality in long-term machining.View Product →
The center of an end mill has almost zero surface speed. That is the key to plunge behavior: the closer you get to the axis, the more the tool rubs rather than slices. A center cutting end mill solves the geometry problem, but it does not remove the need for a conservative entry.
If the machine has plenty of rigidity and the tool is short, a center cutting end mill can make an efficient entry. If the setup is tall or the material is hard, reduce the plunge, use a pre-drill, or switch to a ramped entry. The best result is the one that keeps the tool and the part stable.
Most center cutting problems show up as one of four symptoms. The fix is usually in the entry method, chip evacuation, or runout rather than the tool label.
For a deeper look at wear patterns, our end mill failure and troubleshooting guide walks through common breakage causes and setup checks.
When you are choosing a center cutting end mill, work from the operation backward. The tool needs to match the machine, the material, and the entry method, not just the diameter.
We build our solid carbide end mill range around these practical distinctions, from general-purpose NNC tools to material-specific NNB, NNL, NNT, NNS, NNX, NNH, and NNCH series. If you are unsure which center cutting geometry fits a job, share the material, depth, and operation with us; the answer is usually clearer than the catalog page suggests.
A center cutting end mill earns its place when a job needs a clean vertical entry, a controlled ramp, or a pocket that starts without a drill. Treat the center as a cutting edge that needs feed and chip clearance, not as a license to plunge at full speed. Match the flute count, coating, and entry method to the work, and the tool will do what it was designed to do: cut confidently from the middle outward.

We are End Mills Manufacturer and End Mill Bits Factory. Our Footprints Are Around The World, We provide quality products and services to customers from all over the world.


No.233-3 Yangchenghu Road, Xixiashu Industrial Park, Xinbei District, Changzhou City, Jiangsu Province


+86-18068566610


sales@magotan-tools.com
+86-18068566610
