
Address:
No.233-3 Yangchenghu Road, Xixiashu Industrial Park, Xinbei District, Changzhou City, Jiangsu Province


Content
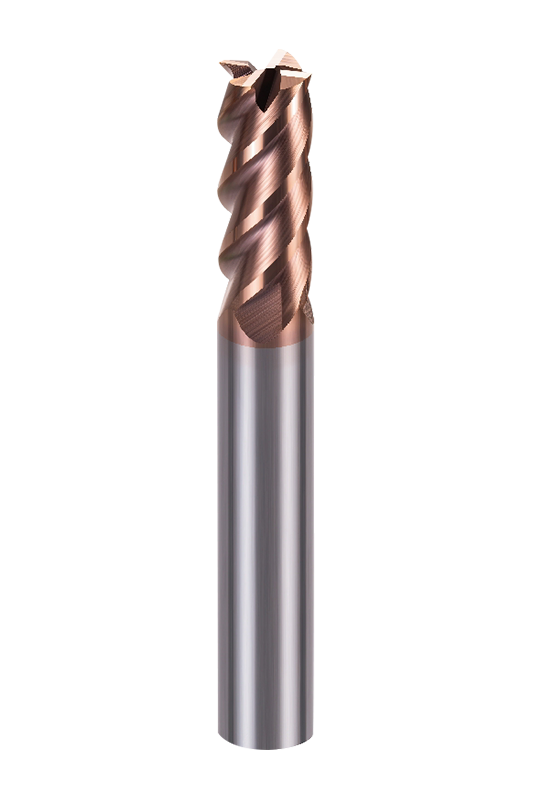
A standard 2-flute twist drill has two symmetrical flutes for chip evacuation, but a 4 flute drill bit adds two more cutting edges. That simple change shifts everything: core thickness, rigidity, chip clearance, and hole straightness. Four flutes mean a larger web, which boosts torsional stiffness by 30–50% compared to a same-diameter 2-flute drill.
The trade-off is evident at a glance. Increased core diameter reduces flute volume, leaving less room for chips. In aluminum or soft plastics, those packed chips lead to friction, heat, and eventually a seized tool. That is why 4-flute drills are rarely the first choice for aluminum—unless the application demands side milling or chamfering immediately after drilling.
However, the extra flutes also provide more contact points in the hole. This stabilizes the tool, reducing wander on entry and improving roundness in materials like cast iron or alloy steel. When paired with an appropriate point angle and coating, a 4 flute drill bit can hold surface finish values below Ra 1.6 µm in 4140 steel, a mark a worn 2-flute drill cannot reliably deliver.
| Flutes | Core thickness | Relative flute area | Torque capacity | Typical chip size |
|---|---|---|---|---|
| 2 | ~20% of diameter | 100% (reference) | Lower | Large, continuous |
| 3 | ~25% of diameter | ~70% | Medium | Medium |
| 4 | ~30–35% of diameter | ~45–55% | Higher | Small, segmented |
The point geometry also changes. Many 4-flute drills adopt a 135° split point or a self-centering chisel edge design, which reduces thrust force. When you finish a hole and need to interpolate a larger diameter or add a chamfer, those extra flutes transform the tool into a drill-mill hybrid. That is why shops looking for process consolidation often invest in a solid carbide 4 flute drill bit designed for both drilling and light profiling.
Material compatibility is the single biggest factor that separates a productive 4 flute drill from a scrap part. The rule of thumb is simple but worth memorizing: when chips are long and stringy, use fewer flutes to avoid packing; when chips break short and the material is abrasive, more flutes distribute wear and hold tighter tolerances.
Aluminum alloys (6061, 7075) generate continuous chips that demand maximum flute volume. A 2-flute drill with polished flutes and a 118° point angle evacuates those ribbons effortlessly. Switch to a 4 flute and you inherit built-up edge, poor chip flow, and a ragged hole finish. For copper and brass, a 3-flute sits in the sweet spot—better rigidity than a 2-flute, yet enough chip clearance for the segmented chips these materials produce.
Now shift to 316 stainless or Ti-6Al-4V. Work hardening and heat build-up are the real enemies. A 4 flute carbide drill with a 140° point and AlTiN coating distributes cutting pressure across four edges, lowering per-edge load and heat generation. The result is often a 40% increase in holes per tool compared to a 2-flute when drilling Inconel 718 at the same speed. For cast iron, the abrasive powder-like chips from 4-flute drills actually aid heat dissipation, and the increased land contact burnishes the hole wall.
| Material | Condition | Recommended flutes | Key reason |
|---|---|---|---|
| Aluminum, magnesium | Wrought, T6 | 2 | Maximum chip clearance, prevents BUE |
| Brass, copper | Annealed | 2 or 3 | Good chip form, moderate rigidity required |
| Low-carbon steel (1018) | Annealed | 3 or 4 | Short chips; 4-flute improves hole straightness |
| Alloy steel (4140, 4340) | 30–40 HRC | 4 | Rigidity and burnishing effect |
| Stainless steel (304, 316) | Solution annealed | 4 | Work hardening resistance, improved tool life |
| Tool steel (D2, A2) | Annealed | 4 | Abrasion resistance, tight H7 tolerances |
| Titanium, Inconel | Annealed | 4 | Lower per-flute cutting forces, heat distribution |
| Cast iron | Grey, ductile | 4 | Powder chips, excellent surface finish |
| Plastics, composites | Acrylic, FR4 | 2 | Heat-sensitive; 4-flute melts the hole wall |
Equally important is the hole depth. If your depth-to-diameter ratio exceeds 5:1, a 4-flute drill often outperforms a 2-flute in steel because the added web strength resists deflection. But you must pair it with through-coolant and a strict pecking cycle. For blind holes in aluminum, the 2-flute still holds the advantage because it pulls chips out more aggressively, even without high-pressure coolant.
For shops machining pre-hardened mold steels or stainless valve bodies, the rigidity and precision of solid carbide 3-flute drill bits can serve as a bridge between chip evacuation and stiffness, but when the tolerance calls for H7 or better, a 4-flute remains the standard.
Cutting parameters for a 4 flute drill bit are not simply a multiple of a 2-flute’s feed rate. Because each flute takes a smaller chip, you can increase the feed per revolution, but that must be balanced against the reduced flute volume. The table below offers starting parameters for through-coolant carbide drills. Reduce speeds by 15–20% if using external coolant only, and by 30% for HSS-E (cobalt) drills.
| Material | Cutting speed (SFM) | Feed per rev (IPR) | Coolant type | Point angle |
|---|---|---|---|---|
| 1018 steel | 260–330 | 0.008–0.012 | Emulsion 8–10% | 140° |
| 4140 (30 HRC) | 200–260 | 0.006–0.010 | Emulsion 10% | 145° |
| 316 stainless | 130–180 | 0.004–0.007 | Neat oil or MQL | 145° |
| D2 tool steel | 120–150 | 0.003–0.006 | Neat oil | 135° |
| Ti-6Al-4V | 100–130 | 0.003–0.005 | High-pressure oil >1000 psi | 140° |
| Grey cast iron | 180–230 | 0.010–0.015 | Dry or air blast | 118° |
| Ductile iron | 140–200 | 0.006–0.010 | Dry or mist | 135° |
| Aluminum 6061 | 600–1000 | 0.012–0.018 | Flood emulsion | 118° |
Notice the aggressive feed rates for cast iron: the brittle chip fractures easily, so you can push higher feeds without risk of chip compaction. In stainless, the lower feed per rev reduces work hardening at the cutting edge. When running a deep hole drill twist drill in 316, start at the bottom of the feed range and adjust based on chip color—a light straw indicates good heat management, while blue or purple signals a need for reduced speed or improved coolant flow.
In titanium, through-tool delivery pressure above 70 bar (1000 psi) is non-negotiable. Without it, the chips weld to the flute even at conservative speeds. One mistake shops make is applying a 2-flute feed chart to a 4-flute drill and doubling the feed per tooth. That doubles the chip thickness and chokes the flutes. Always use the table above as a dedicated reference for 4-flute geometries.
A bare carbide 4 flute drill bit cuts alloy steel today and fails tomorrow. The right coating extends tool life not by a few percent, but often by a factor of two to three. The challenge is matching the coating’s thermal barrier, oxidation resistance, and friction coefficient to the material at hand.
| Coating | Max working temperature | Best material match | Friction coefficient | Typical life improvement vs uncoated |
|---|---|---|---|---|
| TiAlN | 800°C | Alloy steels, cast iron | 0.30–0.35 | 2x–3x |
| AlTiN | 900°C | Stainless, Inconel, titanium | 0.35–0.40 | 3x–4x |
| TiSiN | 1100°C | Titanium, superalloys | 0.45 | 4x+ (high heat applications) |
| Uncoated polished | N/A | Aluminum, brass, copper | 0.25 | Baseline |
TiAlN is the workhorse for steels above 30 HRC. Its aluminum oxide layer forms at high temperatures, protecting the carbide from diffusion wear. But when drilling 304 stainless, AlTiN with a higher aluminum content resists built-up edge better and can handle the heat spikes that come with interrupted cuts in weldments. TiSiN, though more expensive, is worth the premium in titanium because its silicon oxide layer prevents chip adhesion even when coolant is momentarily interrupted—a common scenario in deep hole pecking.
Avoid coated drills for long-chipping aluminum. The coating’s microscopic roughness grabs the soft metal and encourages built-up edge. Instead, use a bright finish or a thin ZrN coating if you must bridge to mild steel in a mixed-material job. Regardless of the coating selected, the edge preparation matters just as much: a light hone (0.0005–0.001") on an AlTiN-coated 4-flute drill dramatically reduces micro-chipping in hardened steel compared to a sharp edge.
Even the best 4 flute drill bit will misbehave if the setup or parameters drift. Diagnosing failure modes quickly separates a stable process from a production halt. The table below lists the most frequent issues, their root causes, and corrective actions.
| Symptom | Likely cause | Solution |
|---|---|---|
| Chipping on cutting edges | Excessive feed or runout >0.0004" | Reduce feed 15%, check holder TIR, add edge hone |
| Spiral marks or poor finish | Chip packing in flutes | Increase coolant pressure, reduce feed, check peck cycle |
| Oversize holes | Weak core, worn margins | Use a solid carbide 4-flute with thicker web, reduce speed |
| Short tool life in stainless | Work hardening, insufficient coating | Switch to AlTiN, ensure continuous cut (no dwelling) |
| Loud squeal, vibration | Incorrect point geometry or dull edges | Resharpen with 135° split point, check stick-out |
| Thermal cracking | Interrupted coolant, thermal shock | Use through-coolant only, avoid peck in very hard materials |
Chip packing deserves special attention with 4-flute drills. Because the flute cross-section is smaller, a poorly timed peck cycle does more harm than good. For a 10 mm drill in 4140 steel, set the first peck to 2.5xD and subsequent pecks to 0.5xD. That clears the flutes before the chip compresses into a plug. When an operator sees ragged holes and assumes the tool is dull, the real culprit is often a chip packed into just one flute, pushing the drill off-center.
For holes requiring IT7 tolerance, runout at the drill tip must stay below 10 microns. A worn collet or cheap sidelock holder will cheat you out of a perfect hole every time. Investing in a high-precision hydraulic or shrink-fit holder is the single fastest way to eliminate size and finish complaints with a 4 flute carbide drill.
Deep holes—anything with a length-to-diameter ratio above 3—test the stiffness and chip evacuation limits of a 4 flute drill bit. The tool’s thick web becomes an asset here, resisting wander and bell-mouthing that plague long-reach 2-flute drills. Still, without a disciplined pecking strategy and enough coolant pressure, you end up with a thermal crack or a welded chip halfway down the hole.
Standard G73 pecking (chip break) works for L/D 3–5, but switch to G83 (full retract) for L/D above 5 in steel. For a 6 mm drill, set the first peck to 3xD (18 mm), then reduce each subsequent peck to 0.4xD (2.4 mm) to offload the flutes gradually. The critical mistake is retracting all the way to the clearance plane without dwelling—chips spin off better if you pause at the R-plane for at least 0.5 seconds.
Coolant must enter the cutting zone, not just flood the part. For 4-flute drills above 3 mm diameter, through-tool pressure should be at least 20 bar (290 psi) for steel, and 70 bar (1000 psi) for stainless or titanium. If your machine lacks through-spindle coolant, use an in-line booster pump or a dedicated coolant-fed holder adapter. Mist or air blast will not cut it beyond L/D 4; chips simply pack and weld to the margin.
When stacking operations—drill, then side-mill the hole—you need the core rigidity of a high-precision 4-flute flat end mill approach, but a dedicated 4-flute drill with a reinforced shank can often handle light side-milling at 10–15% radial engagement. Just program a small lead-in and keep the depth of the milling pass shallow to avoid lateral fracture of the carbide.
The upfront cost of an indexable 4-flute drill looks attractive until you measure actual cost per hole. A solid carbide drill costs more initially but delivers tighter tolerances, higher speed capability, and no downtime for insert rotation. The decision tree branches on batch size, material, and hole tolerance.
For production runs under 500 holes in alloy steel with an H8 or tighter tolerance, solid carbide wins outright. The time saved eliminating insert index checks and tool changes offsets the higher purchase price. One study in a valve body machining cell showed a solid carbide 4 flute drill bit produced 3,200 holes in 4140 at 30 HRC before reaching a 0.25 mm flank wear limit. An equivalent indexable drill required two insert rotations and still lost roundness after 800 holes, with total cost per hole 18% higher once labor was accounted for.
Indexable 4-flute drills shine in large diameters (above 25 mm) and in materials that quickly abrade carbide grades, like cast iron with surface scale. The ability to change a chipped insert without removing the body saves machine down time. But in the 3–20 mm diameter range common in CNC Swiss and machining centers, the solid carbide tool’s one-piece rigidity delivers straighter, more repeatable holes.
| Factor | Solid carbide 4-flute | Indexable 4-flute |
|---|---|---|
| Typical diameter range | 0.5–20 mm | 12–60 mm |
| Tolerance (first hole) | H7 | IT8 |
| Tool change time | Minimal (full replacement) | Low (insert flip) |
| Cost per hole (4140, 10 mm, 1000 holes) | $0.43 | $0.53 |
| Initial tool cost | Higher | Lower |
| Rigidity | Excellent | Moderate |
The hidden cost of indexable drills often lies in the setup. Radial alignment of the insert seats must be checked with a dial indicator; a 0.05 mm deviation means one insert cuts more than the other, producing an oversize hole and shortening tool life. With a solid carbide 4-flute, you gauge the runout once and you are done. For shops machining graphite electrodes or copper, solid carbide 4-flute flat end mills for copper electrode machining offer similar geometric stability, making them a smart companion tool for finishing operations after drilling.
Selecting a 4 flute drill bit does not require a stack of catalogs if you follow a clear sequence. Start with the material, not the machine. The workpiece material dictates the substrate grade, coating, point angle, and flute count. Once that is locked in, choose the diameter based on the hole tolerance and finishing allowance.
A well-documented parameter sheet stored with the tool at the machine reduces the mental load on operators and prevents costly trial cuts. If your shop regularly drills hard-to-machine alloys, consider standardizing on a single high-performance series—like a high-performance 4-flute flat end mill that shares the same substrate and coating across multiple diameters. It simplifies inventory and keeps the process predictable.
We are End Mills Manufacturer and End Mill Bits Factory. Our Footprints Are Around The World, We provide quality products and services to customers from all over the world.

No.233-3 Yangchenghu Road, Xixiashu Industrial Park, Xinbei District, Changzhou City, Jiangsu Province

+86-18068566610

sales@magotan-tools.com
+86-18068566610
